Select the Contacts -> Setup Contact Manager menu, and choose QuoteWerks as your preferred contact manager. Click on the [Import Contacts] button to start the Contact Import Wizard.
|
Step 1: Selecting the Source
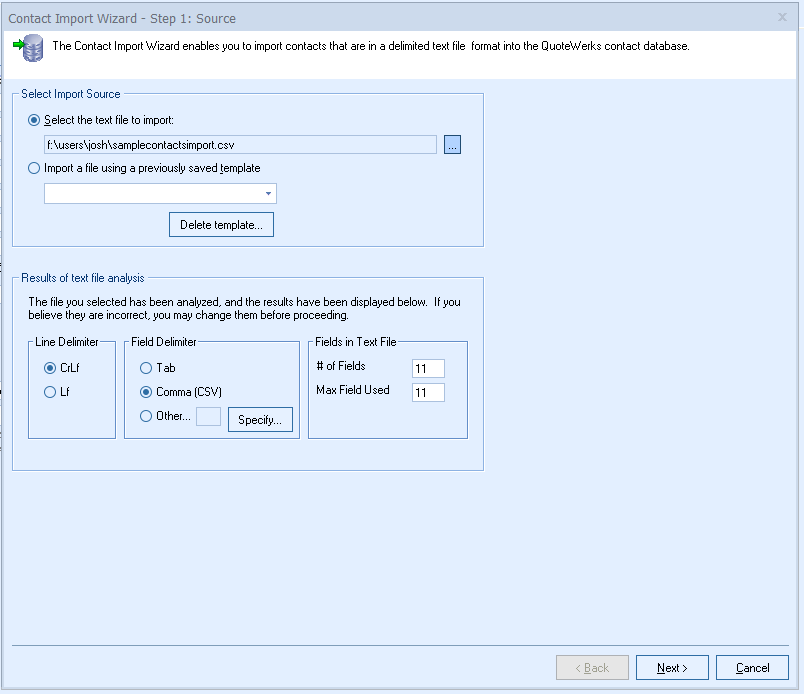
You will begin the process by selecting the text file that you wish to import. You can select the file manually, or load a template that you saved previously. See Templates for more details.
After you have selected the text file, QuoteWerks will attempt to determine if it is comma or tab- delimited. QuoteWerks will also attempt to determine how many columns of data there are in the text file. QuoteWerks will display the delimiter and number of columns that it found on this window. If you believe that QuoteWerks did not correctly detect the settings, you may change the settings.
Step 2: Mapping
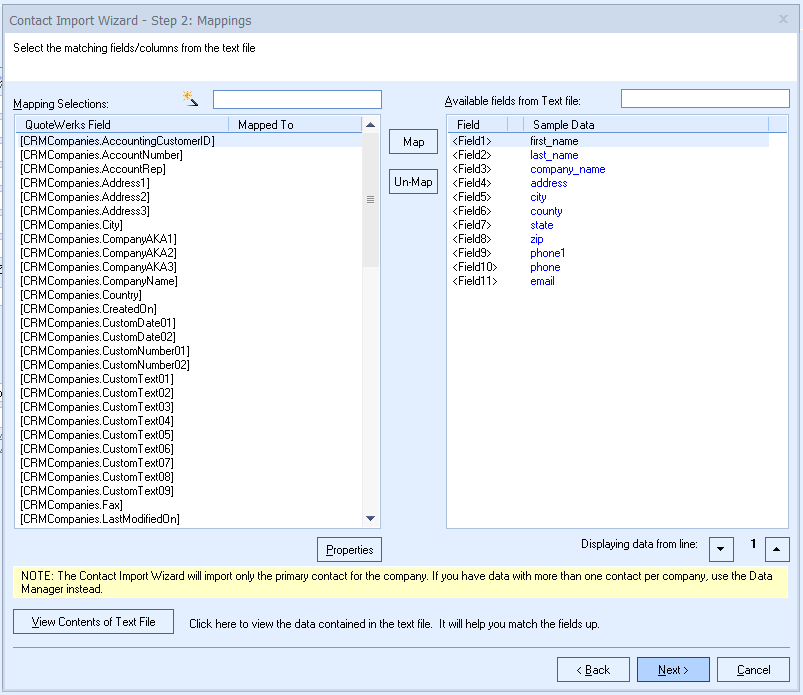
On this window, you will tell QuoteWerks how the columns of data in the text file will pair up with the fields in QuoteWerks that are used to store the contact name, company name, address, etc.
For example, click on the QuoteWerks Field on the left that you wish to map, then select the Available Fields from Text file field and click the map button.
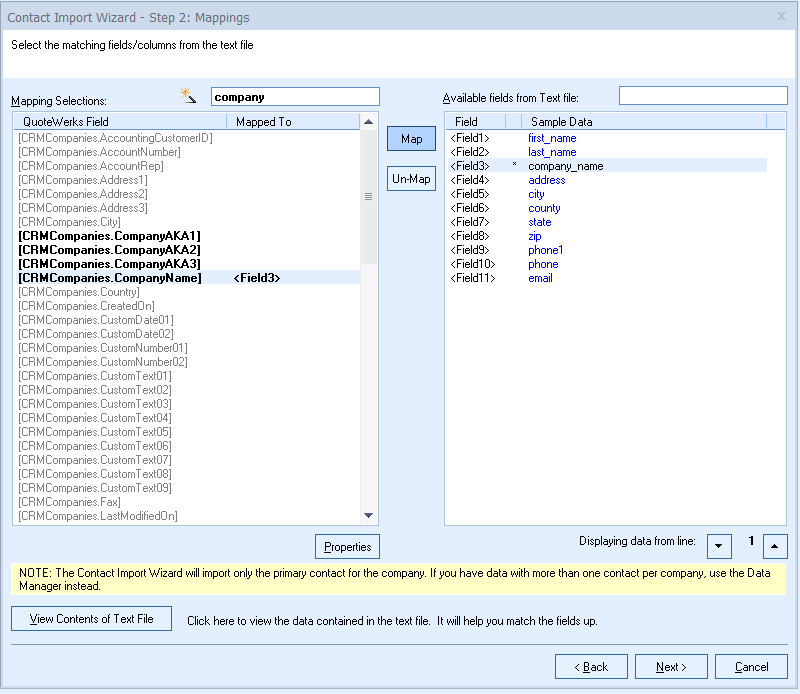
In the example below we are mapping the QuoteWerks [CRMCompanies.CompanyName] field to the "company_name" field in the text file. You can tell these fields have been mapped because <Field3> shows on the left in the Mapped To column and there is a * that has been added between <Field3> and company_name on the right.
A completed mapping will look something like below with most if not all of the fields showing as mapped. In this example you can see that the only field not mapped is the "county" field. That is because there is no corresponding field in the QuoteWerks Database. If you would like to map a non standard field you can do so by using any of the "CustomText" fields.
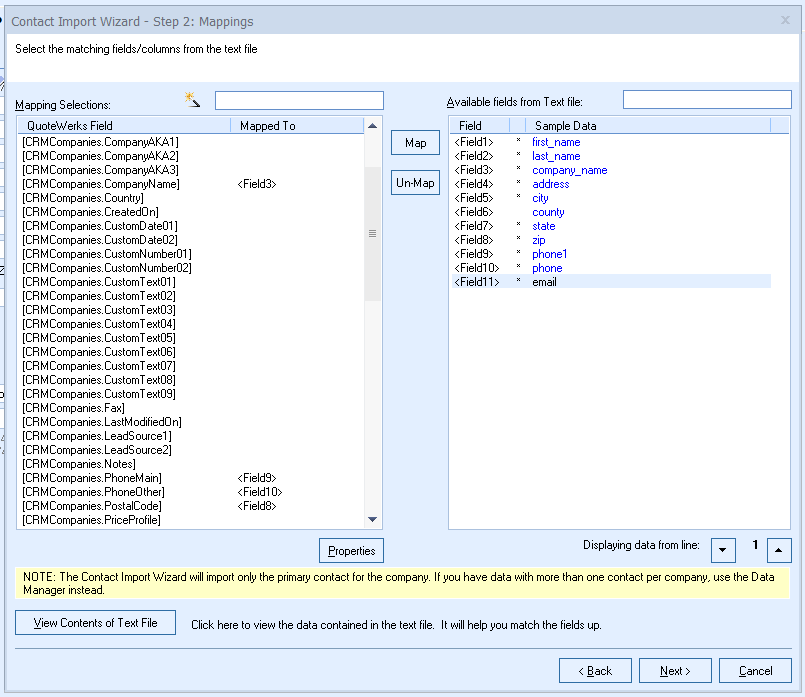
Important: The Company field is a required field for the QuoteWerks Contact Manager |
|
Step 3: Options
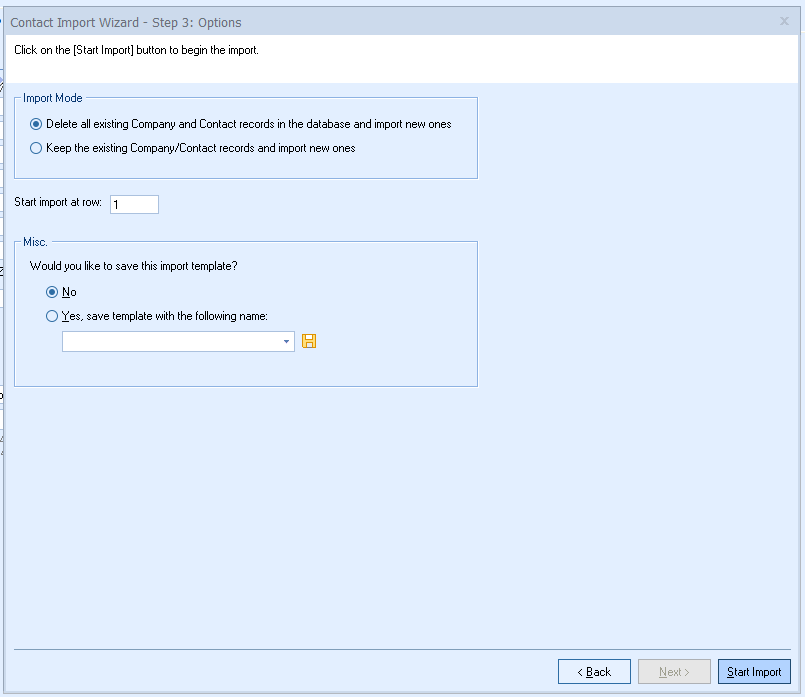
The Options window allows you to set the Import Mode and allows to you choose whether to save the Import Settings as a template.
Delete all existing contacts in the contact database, and import the contacts.
Select this option to delete all the existing contacts in the contact database before beginning the import of the new contacts. Keep in mind that if you have made any changes to the contacts that already exist in the database, deleting them will cause you to lose these changes.
Append the contacts to the existing contacts.
Select this option to only add the contacts from the text file into the contact database. QuoteWerks does not check to see if the contacts that you are adding already exist. If the contact does already exist, duplicate entries will appear.
Save the import options to a template before starting the import
To save the wizard settings, select "Yes, save template with the following name:" and give the template a name. The next time you need to import the data you can load this import template and start the import process with only minor modifications. The contact import template files are stored in the SystemSettings table under the SectionName Contact Import Templates.
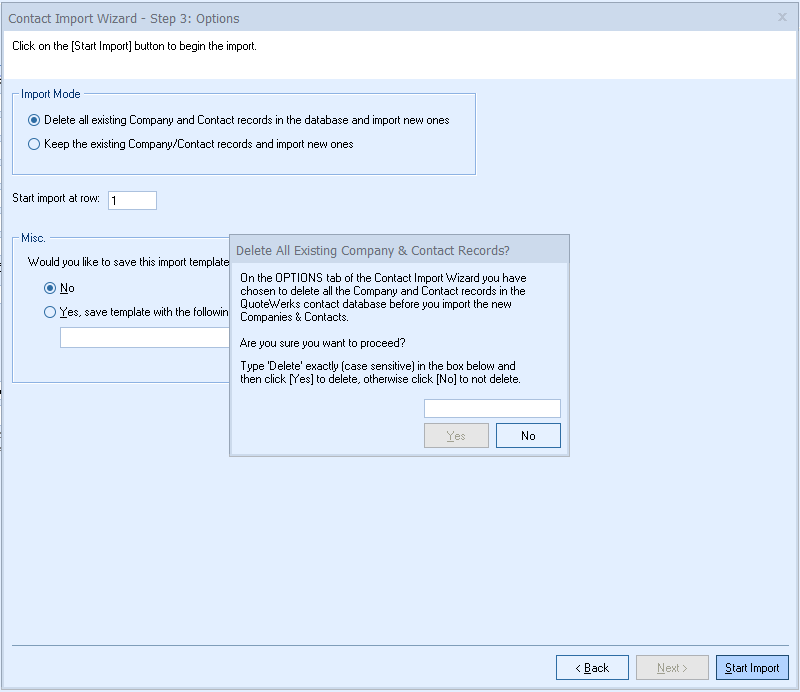
When you are ready to being the import select the "Start Import" button:
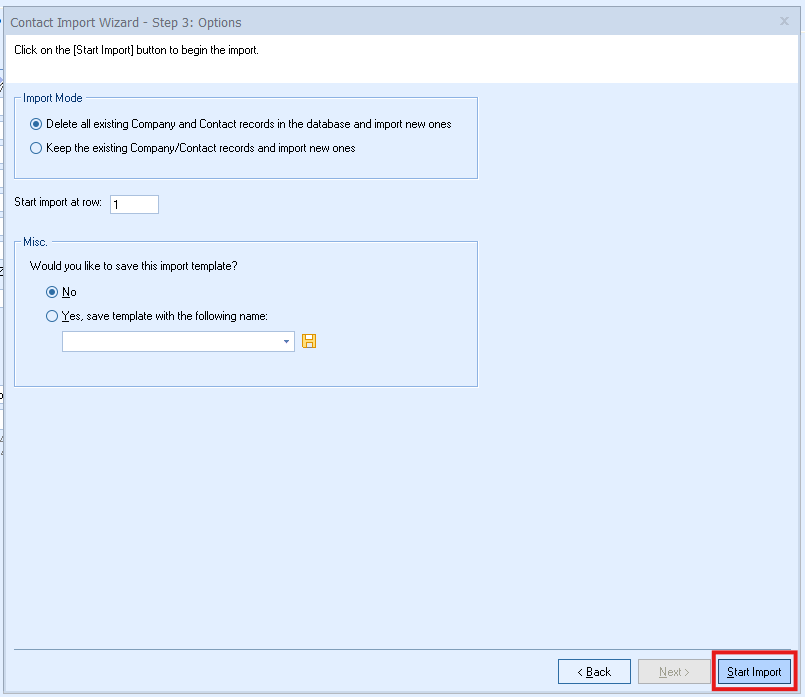
If you have selected the option to "Delete all existing Company and Contact records in the database and import new ones" you will be prompted to confirm your selection.