The following fields on the Document Items tab support Rich Text: Description, CustomMemo01, CustomMemo02, CustomMemo03, CustomMemo04, CustomMemo05. This means you can format rich text directly from the Document Items tab and have that rich text display on printed output.
To have rich text display on printed outputs you must reference the rich text macro fields in the document layout which will correspond to their non rich text ones. For example, to have rich text print for CustomMemo01 you would use a macro with the postfix of "Rich Text." The macro you would insert into your layouts to display rich text for CustomMemo01 would be "CustomMemo01RichText". If you use just CustomMemo01 the rich text formatting will not display on the printed outputs.
Additionally, rich text must be enabled on the Layout by toggling the rich text box in the Layout Designer. For instruction on how to do this please see the Rich Text Example.
This help file contains the following sections:
To enable rich text you must first toggle it on by navigating to Setup -> Options -> Misc and selecting the Enable Rich Text check box. Clicking OK saves these changes.

Once you have enable rich text you can click into the fields below on the Document Items tab and the Edit window will appear displaying the rich text options.
•Description
•CustomMemo01
•CustomMemo02
•CustomMemo03
•CustomMemo04
•CustomMemo05
To edit a field with rich text either click on the field or open the Preview Panel (for description only) and click on Edit. Both options will open the Edit window where you can adjust the rich text formatting of the selected field.
The following options are available to format the text:
 Adjust the font style and size
 Bold font
 Italicize font
 Underline font
 Strike through font
 Adjust text color
 Adjust background color
 Add a Hyperlink
 Align text
 Undo and redo actions
 Remove Formatting
 Open Text Library
Rich Text Shortcuts (Edit Window)
ESC Escape
ENTER Insert Paragraph
CTRL+Z Undo the last command
CTRL+Y Redo the last command
TAB Tab
SHIFT+TAB Untab
CTRL+B Set a bold style
CTRL+I Set a italic style
CTRL+U Set a underline style
CTRL+SHIFT+S Set a strikethrough style
CTRL+BACKSLASH Clean a style
CTRL+SHIFT+L Set left align
CTRL+SHIFT+E Set center align
CTRL+SHIFT+R Set right align
CTRL+SHIFT+J Set full align
CTRL+SHIFT+NUM7 Toggle unordered list
CTRL+SHIFT+NUM8 Toggle ordered list
CTRL+LEFTBRACKET Outdent on current paragraph
CTRL+RIGHTBRACKET Indent on current paragraph
CTRL+NUM0 Change current block's format as a paragraph(P tag)
CTRL+NUM1 Change current block's format as H1
CTRL+NUM2 Change current block's format as H2
CTRL+NUM3 Change current block's format as H3
CTRL+NUM4 Change current block's format as H4
CTRL+NUM5 Change current block's format as H5
CTRL+NUM6 Change current block's format as H6
CTRL+ENTER Insert horizontal rule
CTRL+K Show Link Dialog
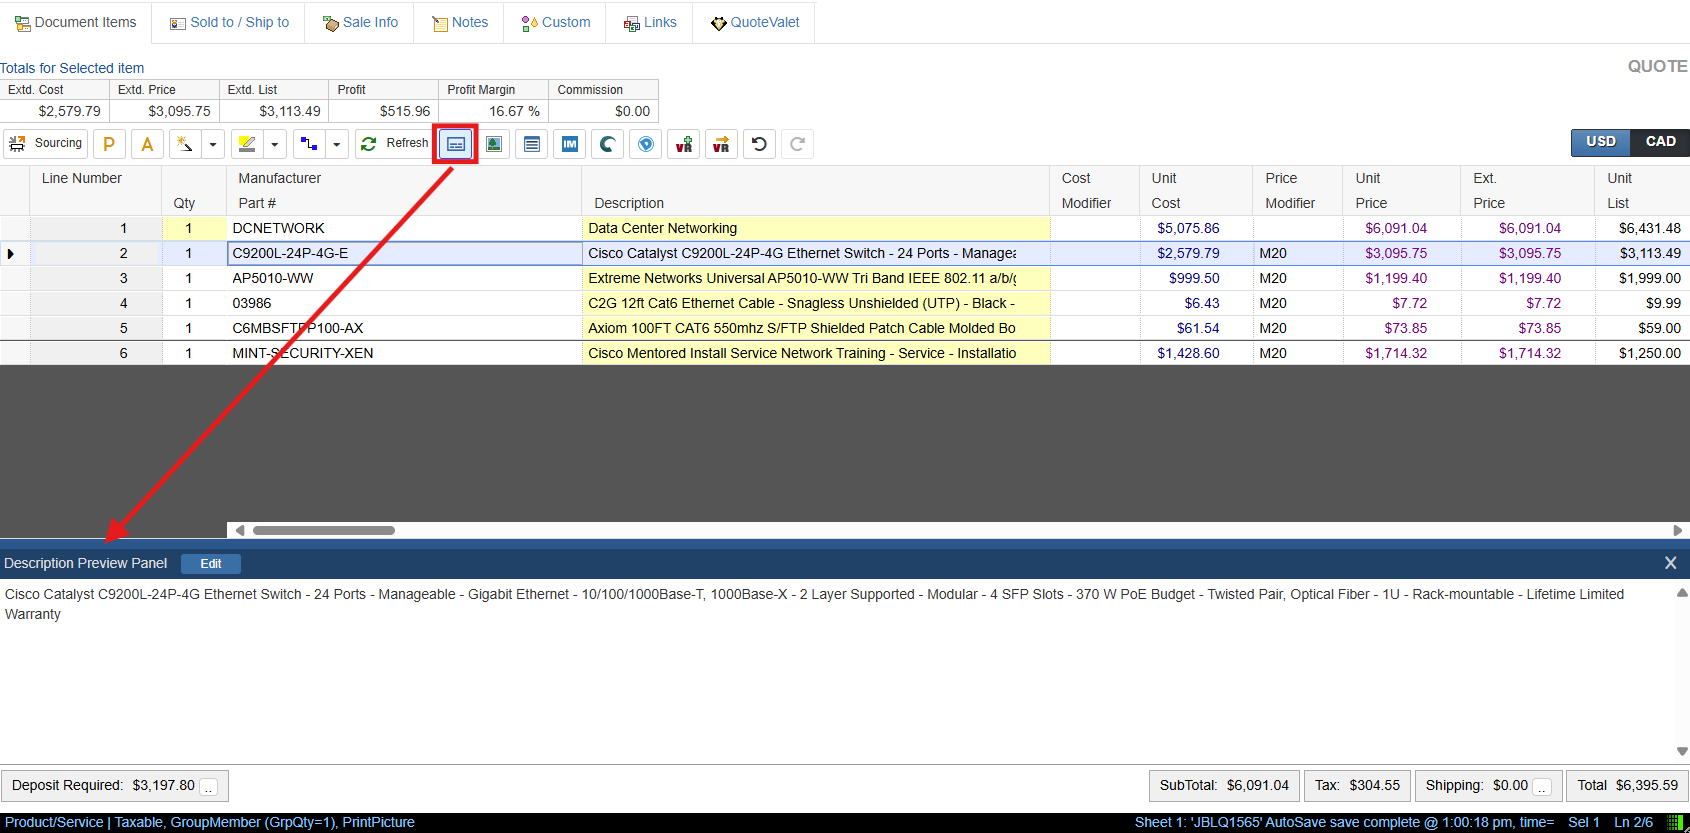
If you would like to view the description rich text formatting without opening the edit window you can do so by toggling on the Preview Panel. This is done by clicking on the  button on the grid toolbar. The preview panel is only available for the description field. To view the rich text formatting for other fields simply click into the field to open the edit window.
To quickly review each lines rich text simply toggle on the Preview Panel and click on each of the rows description field.
With the Preview Panel open you can easily open the Edit Window by clicking on Edit. From here you can adjust the formatting for the selected row.
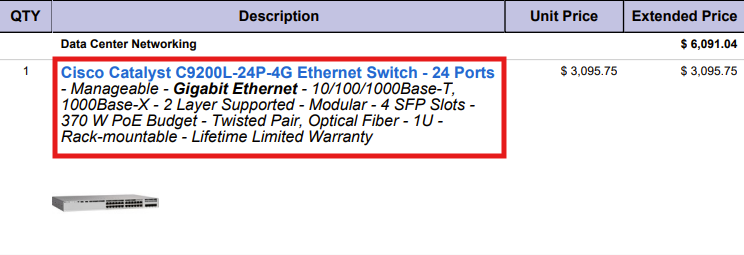
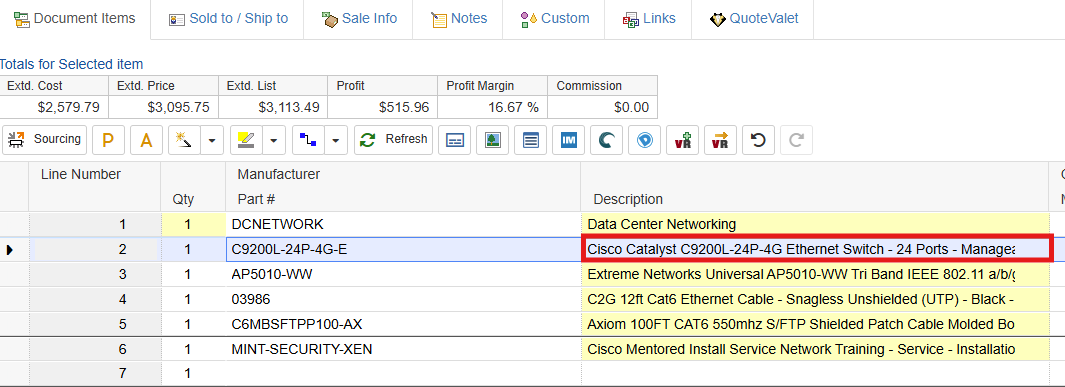
Here is an example of the printed output of a product that does not have rich text enabled. As such it is printing with the formatting as dictated by the documents layout created in the Layout Designer.
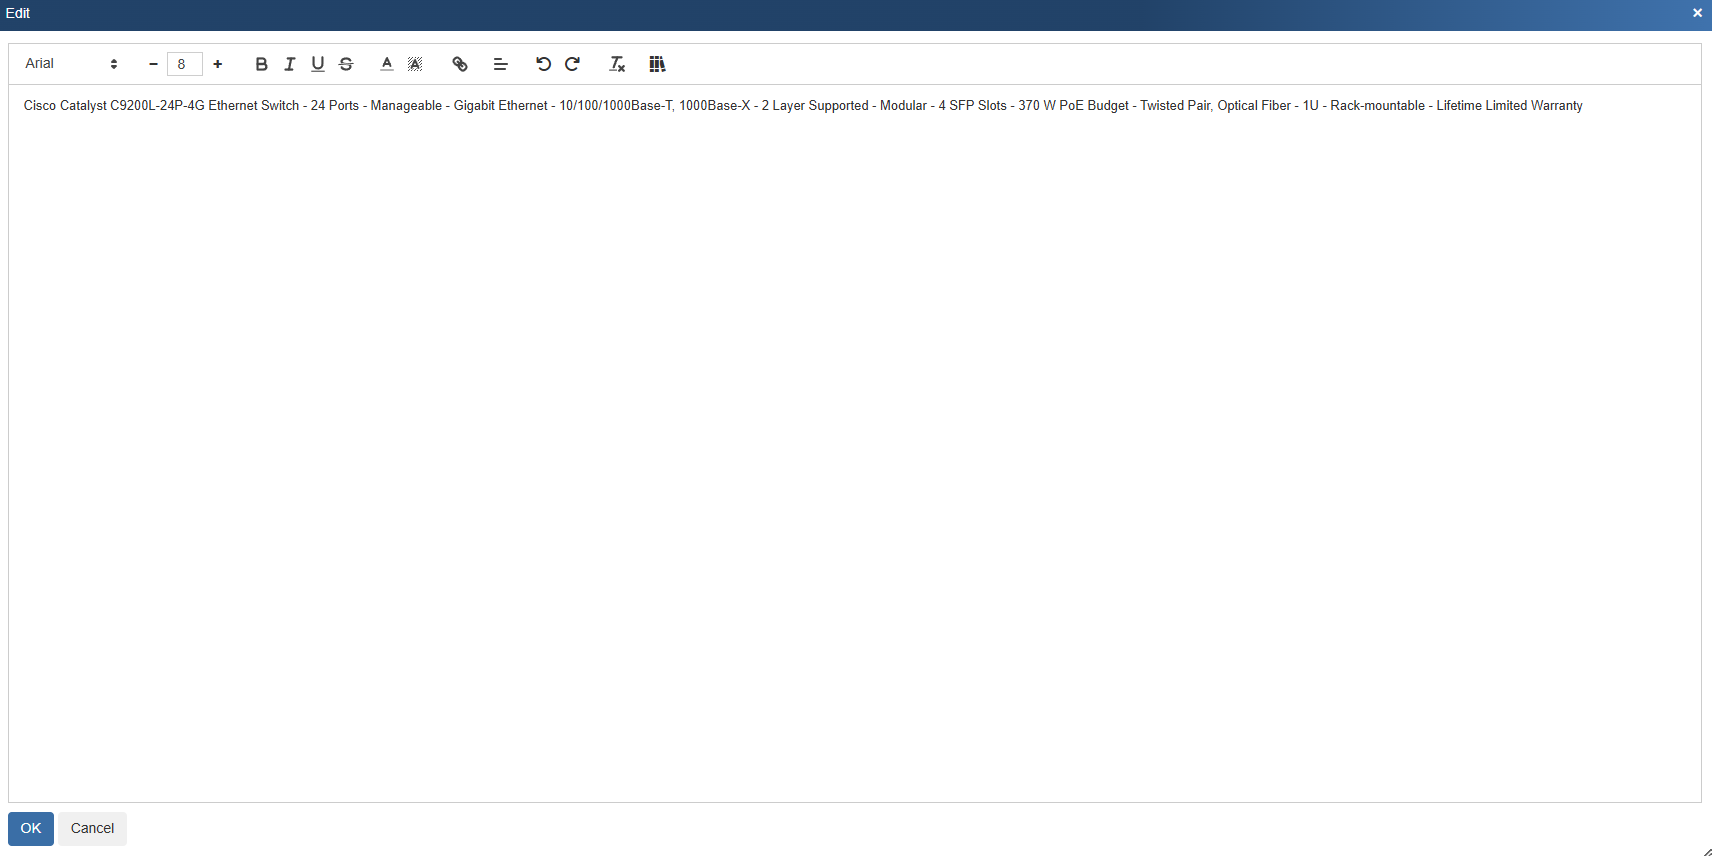
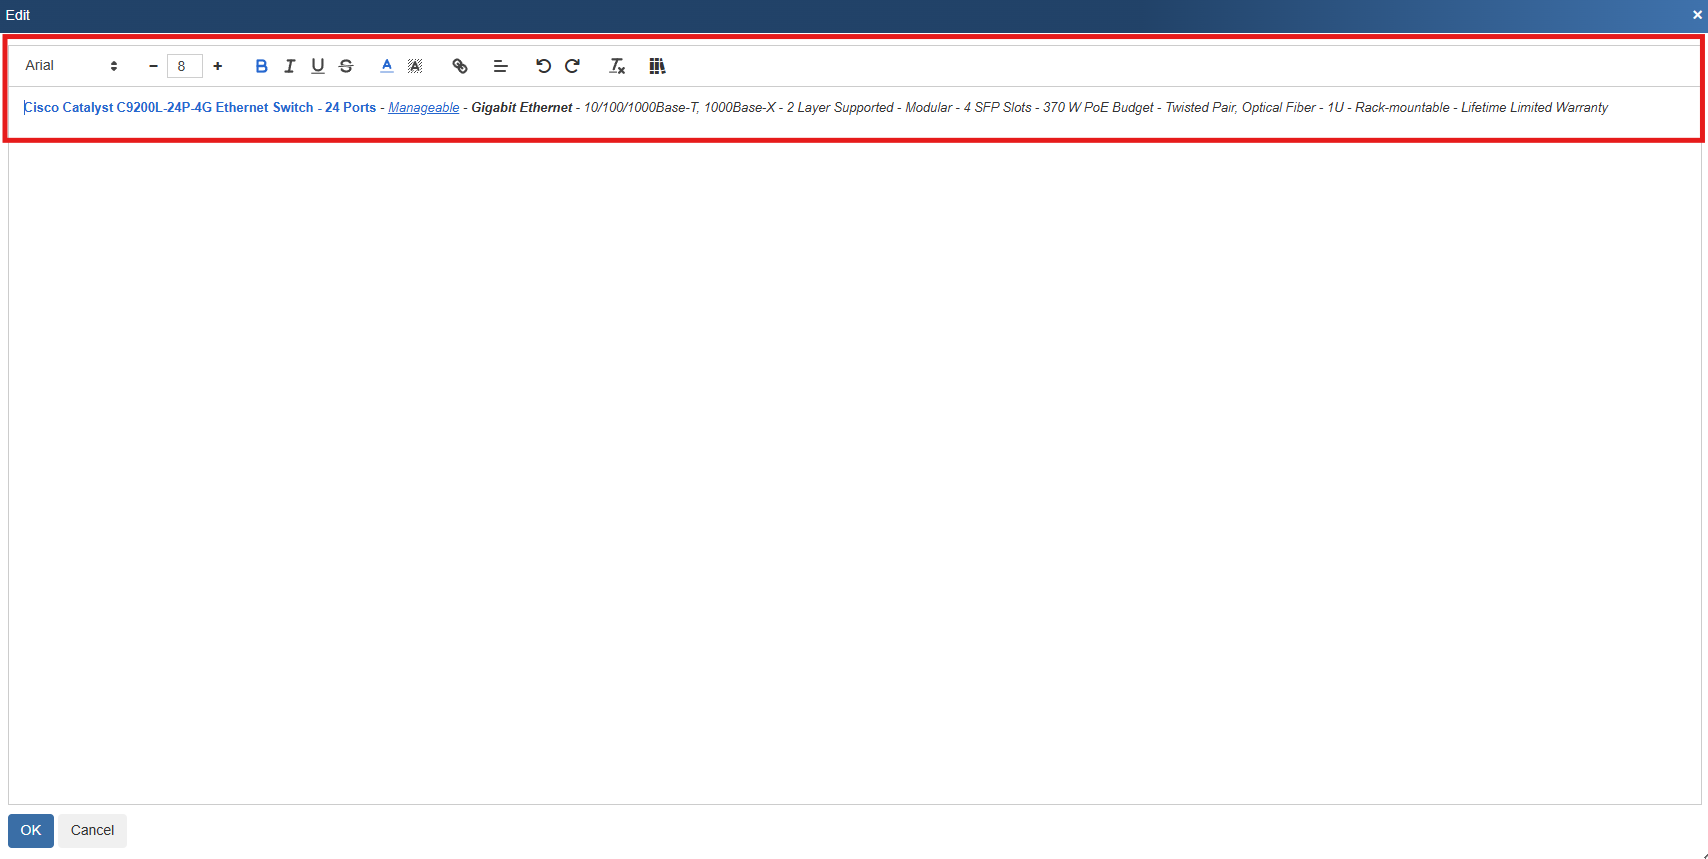
To enable rich text open the edit window by clicking on the field you would like to adjust the formatting of.
In the edit window you can adjust the formatting in whatever way you would like using the rich text options across the top of the window. As you can see here we have changed the font color, added a link, and bold and italicized some text.
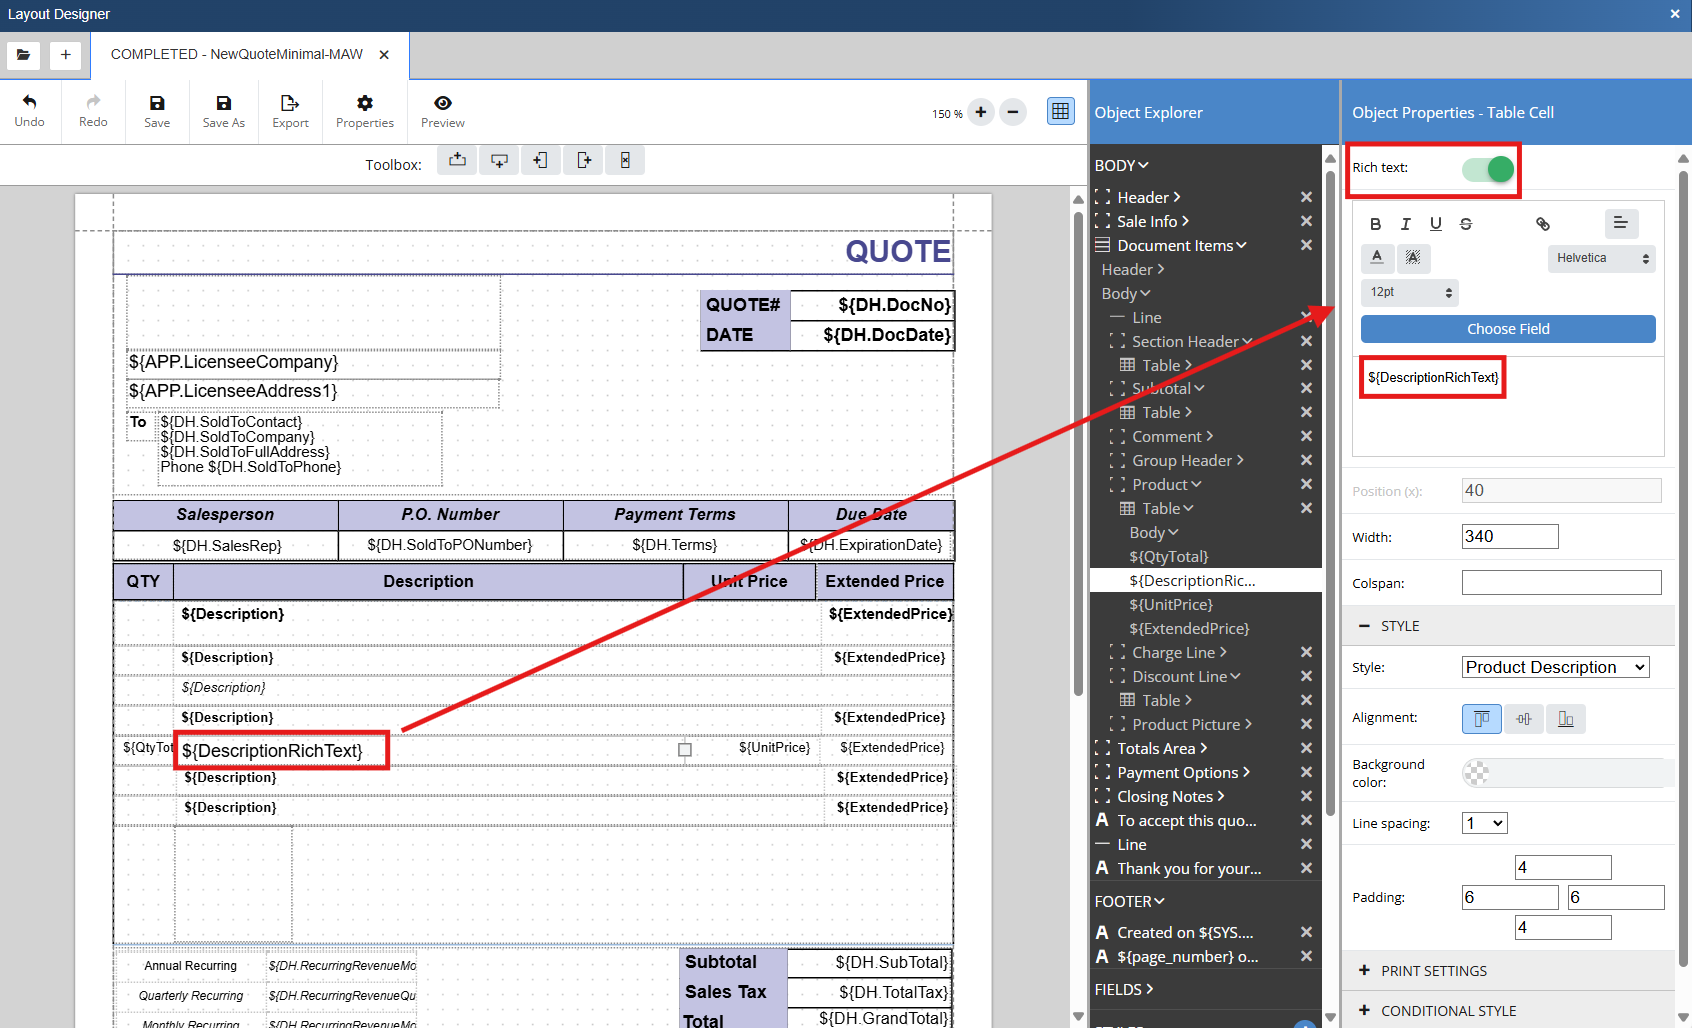
In the layout designer you must toggle on rich text and adjust the field to include the rich text postfix. To do so select the field you wish to edit, toggle on Rich Text and select choose field to find the rich text macro you would like to use. In this example we are adjusting the ${Description} field in the Product frame to be ${DescriptionRichText}.
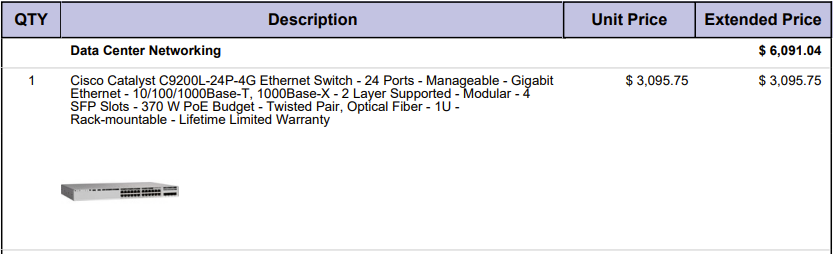
With the above changes made, if we preview the document, the rich text settings set on the Document Items tab will print on the printed output of the document as seen below.